_edited.png)
Understanding Design for Manufacturing (DFM): Optimizing Your Products for Success.
- Nicholas Tamborello
- May 15
- 9 min read

What is Design for Manufacturing or DFM?
Design for Manufacturing (DFM) is a critical engineering discipline focused on proactively designing products to be easy to produce. The ultimate aim is to create a superior product while simultaneously reducing manufacturing costs. This is achieved through a systematic process of simplifying, optimizing, and refining the product's design. You might also hear the term DFMA, which stands for Design for Manufacturing and Assembly; it's often used synonymously with DFM, emphasizing the assembly aspect.
During a comprehensive design for manufacturing review, several core areas are typically scrutinized. These can be broadly categorized into five key principles:
The Manufacturing Process
The Product Design Itself
The Materials Selected
The Operating Environment of the Product
Compliance and Testing Requirements
For DFM to be most effective, it should be integrated at the very beginning of the design journey, long before any investment is made in tooling or production setups. Furthermore, a truly successful design for manufacturing effort involves collaboration from all key stakeholders. This includes engineers, industrial designers, your contract manufacturing partner, tooling specialists, and material suppliers. The goal of this "cross-functional" approach is to thoroughly examine and challenge the design from every angle—component by component, subsystem, overall system, and as a whole. This ensures the design is fully optimized and that no unnecessary costs are inadvertently built in.
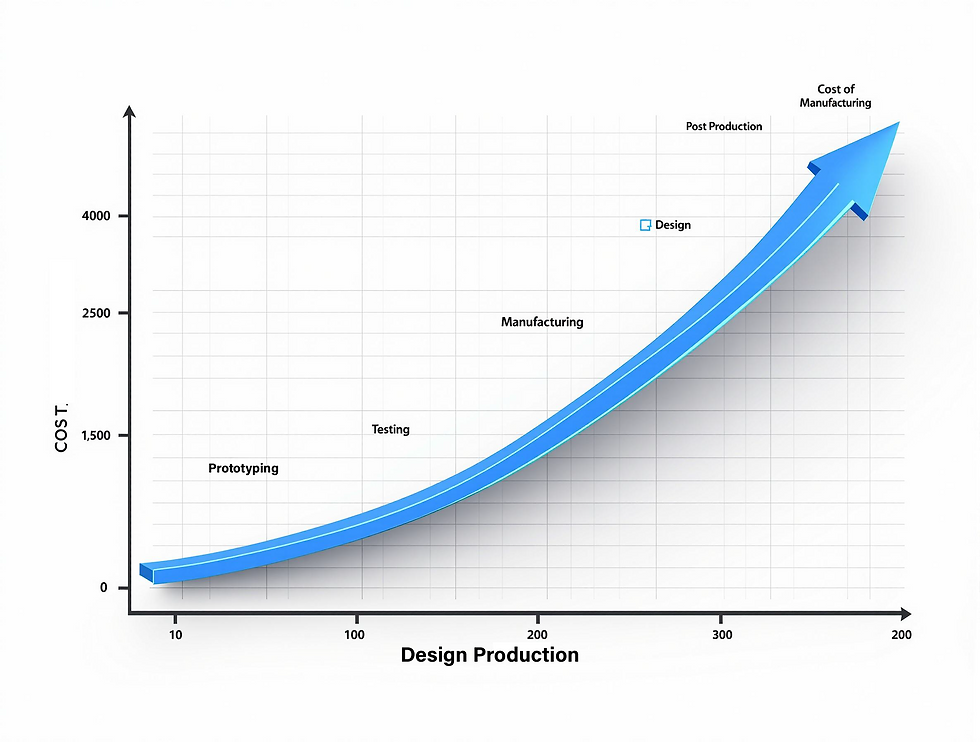
The impact of implementing DFM early cannot be overstated. As a product design moves through its lifecycle, from concept to production and beyond, the cost and difficulty of making changes escalate dramatically. Early-stage DFM allows for design modifications to be implemented swiftly and at the point where they are least expensive.
Bringing all stakeholders to the table is often more straightforward when developing a brand-new product. However, even if you are working with an established product, rigorously challenging the original design is a vital component of a thorough DFM review. It's all too common for design flaws or inefficiencies to be perpetuated by simply replicating a previous design without critical assessment. It's essential to question every facet of your design:
Review the original schematics and drawings with fresh eyes.
Physically deconstruct the product if possible.
Analyze competitive products and those in related fields. What solutions are they using?
Consult with your contract manufacturer – they may have encountered and solved similar challenges for other clients.
Has this particular design problem been addressed effectively in a different way by others?
Is there an opportunity to not just fix, but to significantly improve the design?
Significant thought, time, and expertise are poured into a robust design for manufacturing process. Let's explore how this might unfold by looking at the core principles.
A Closer Look at the 5 Principles of Design for Manufacturing
1 | The Manufacturing Process
The selection of the manufacturing process is foundational. The chosen process must be appropriate for the specific part or product in question. For instance, it would be inefficient to use a capital-intensive process like injection molding, which requires significant investment in tools and dies, for a low-volume part that could be effectively produced using a less capital-intensive method like vacuum forming or 3D printing. This would be a clear case of over-engineering the production approach.
When determining the most suitable manufacturing process, considerations include:
The expected production volume.
The material selected for the part.
The complexity of the part's surfaces and geometry.
The required dimensional tolerances.
Any secondary processes or finishing steps needed.
Many of these considerations will also resurface when evaluating the product's design.
2 | The Product Design
The design itself is paramount. The actual engineering drawings and specifications of the part or product must align with established best practices for the chosen manufacturing process.
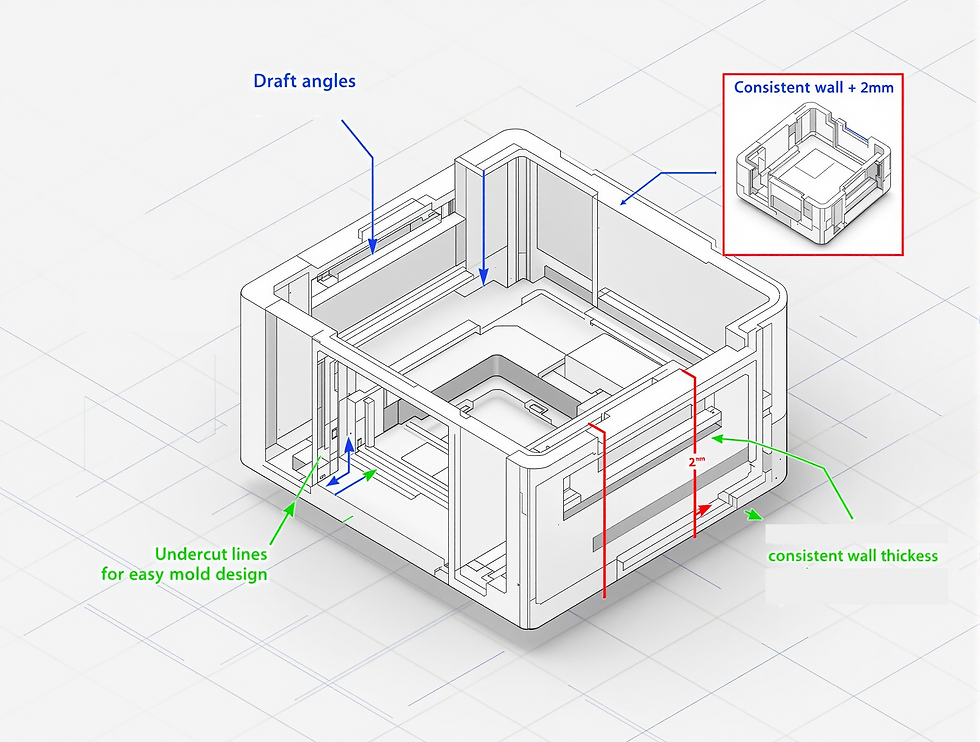
For example, if plastic injection molding is the selected process, key design principles would include:
Consistent Wall Thickness: This promotes uniform and rapid cooling of the part, reducing cycle times and preventing defects like sink marks.
Appropriate Draft Angles: Typically, 1 to 2 degrees of draft are needed on vertical walls to allow the part to be easily ejected from the mold.
Consideration for Texture: If textured surfaces are required, additional draft (e.g., 1 degree per 0.001” of texture depth) is necessary on textured sidewalls.
Rib Design: Ribs used for strengthening should generally be around 60% of the nominal wall thickness to avoid sink.
Smooth Transitions: Avoid abrupt changes from thick to thin sections.
Adequate Wall Thickness: Walls that are too thin can lead to increased injection pressures or weak parts.
Eliminate Undercuts: Design to avoid features that require side actions or complex mold mechanisms, ensuring all features are "in the line of pull" (the direction the mold opens).
Specify Realistic Tolerances: Define the loosest tolerances that still allow for a functional, high-quality product. Consult industry standards for the chosen process to understand what is reasonably achievable.
Always discuss your design intricacies with your contract manufacturer. They can provide invaluable feedback to ensure your design is optimized for the selected manufacturing process.
3 | Material Selection
Choosing the right material is crucial for both functionality and manufacturability. The material must meet the product's performance requirements while also being compatible with the chosen manufacturing process and cost targets.
Key material properties to consider during design for manufacturing include:
Mechanical Properties: How strong, flexible, or rigid does the material need to be? What are its impact resistance characteristics?
Optical Properties: Is transparency, translucency, or a specific reflective quality needed?
Thermal Properties: What temperature ranges will the product experience? How heat resistant must the material be?
Color and Appearance: What are the aesthetic requirements?
Electrical Properties: Does the material need to be conductive or act as an insulator (dielectric)?
Flammability: What are the flame retardancy requirements for the product's application?
Engage with your contract manufacturer regarding material selection. They may have access to preferred material suppliers or existing material portfolios that could lead to better pricing or availability.
4 | The Operating Environment
Your product must be robust enough to withstand the conditions of its intended operating environment. Excellent form and features are meaningless if the product fails under normal use. Consider factors like temperature fluctuations, humidity, exposure to chemicals, UV radiation, vibration, and potential impact. The design and material choices must account for these environmental stresses.
5 | Compliance and Testing
All products must adhere to relevant safety, quality, and regulatory standards. These can include industry-specific standards (e.g., medical, automotive), third-party certifications (like UL, CE, ETL), or internal company-specific quality benchmarks.
Ensure your manufacturing partner has the necessary quality systems (e.g., ISO certification) and testing capabilities. Clarify who will be responsible for conducting various tests and obtaining certifications, and where these activities will take place.
Key Factors Influencing Design for Manufacturing
The overarching goal of DFM is to cut down manufacturing costs without compromising the product's performance or quality. Beyond the five core principles, several factors significantly impact the success of design for manufacturing and assembly:
Minimize Part Count: Reducing the number of individual components in a product is often the most direct route to cost reduction. Fewer parts mean less material, simplified engineering, reduced production and labor efforts, and even lower shipping costs.
Standardize Parts and Materials: Customization is inherently more expensive and time-consuming. Utilizing high-quality, standardized parts can shorten lead times, as these components are typically readily available and their consistency is more predictable. Material selection should be based on the product's intended use and function.
Create Modular Assemblies: Designing with non-customized modules or modular sub-assemblies allows for greater flexibility in product variations and future upgrades without needing to redesign the entire product.
Design for Efficient Joining: Explore ways for parts to interlock, snap-fit, or clip together, minimizing the need for screws, fasteners, or adhesives. If fasteners are unavoidable:
Keep the number, size, and variety of fasteners to a minimum.
Use standard fasteners whenever possible.
Employ self-tapping and chamfered screws for easier and more accurate placement.
Avoid screws that are excessively long or short, separate washers, tapped holes, and less common head types where simpler alternatives exist.
Minimize Reorientation of Parts During Assembly & Machining: Parts should be designed so that minimal manual handling and reorientation are required during production and assembly processes.
Streamline the Number of Manufacturing Operations/Processes: The more complex the manufacturing process, the more opportunities for error are introduced. Every manufacturing process has its inherent limitations and capabilities. Only include operations that are absolutely essential to the product's design and function.
Define "Acceptable" Surface Finishes: Unless the product demands a showroom-quality finish for marketing or specific functional reasons, prioritize function over purely aesthetic, high-cost finishes.
Special Focus: Design for Manufacturing in Plastic Injection Molding
Given its prevalence, let's touch on some key DFM questions specific to plastic injection molding:
Which direction will the tool (mold) pull? A mold typically consists of two halves. Molten plastic is injected, cools, and the mold halves separate to release the part. Any feature on your part that moves in a direction other than the primary pull direction of the mold will complicate the tooling, increasing its cost.
Are there undercuts or features that will get trapped in the mold? Undercuts are protrusions or recesses in a design that prevent the mold from easily sliding away from the part. They can cause the part to get stuck or damaged during ejection. If an undercut is absolutely necessary, it might be accommodated with a "slide" or "lifter" in the mold, but this adds complexity and cost to the tool. It's generally better to eliminate undercuts through design modifications if possible.
How consistent are the wall thicknesses? Thick sections in plastic parts are often designed for strength. However, thickness also dictates cooling time; longer cooling can lead to defects like "sink marks" (depressions on the surface opposite a thick section) and increases cycle time (and thus part cost). Engineers often address this by thinning out overly thick areas and reinforcing them with ribs. Conversely, walls that are too thin can be weak or difficult to fill during molding. A balance is key, with transitions between different wall thicknesses being gradual.
Does the design incorporate adequate draft angles? Straight, vertical walls (zero draft) can cause parts to stick in the mold, making ejection difficult and potentially damaging the part or mold. Draft angles are slight tapers (e.g., 1-2 degrees) applied to these walls to facilitate easy release. The more draft, generally the easier the ejection.
10 Positive Outcomes of an Effective Design for Manufacturing Strategy
A well-executed DFM strategy yields quantifiable benefits. Here are ten widely recognized outcomes:
Minimized Number of Product Parts: Fewer parts directly translate to lower material costs and reduced assembly labor.
Use of Standardized Parts: This reduces costs associated with custom tooling and ensures more predictable quality and availability.
Creation of Modular Designs: Simplifies future redesigns, allows for component reuse across different products, and facilitates product customization.
Design of Multi-Functional Parts: Consolidating functions into fewer parts reduces overall part count and complexity.
Design of Multi-Use Products/Components: Sharing standardized parts across multiple product lines leverages economies of scale.
Design for Ease of Fabrication: Optimizing the interplay between material choice and manufacturing process minimizes production costs. This includes avoiding unnecessarily tight tolerances and labor-intensive finishing operations.
Design for Efficient Joining (e.g., without screws): Snap-fits or interlocking features can significantly reduce assembly time and material costs associated with fasteners.
Minimized Part Handling During Production: Designing for symmetry or clear orientation features reduces manual intervention and errors during assembly.
Minimized Assembly Directions: Ideally, parts should assemble from a single direction (e.g., top-down, aided by gravity) to simplify automation and manual assembly.
Maximized Compliance in Assembly: Features like tapers or chamfers can guide parts during insertion, preventing damage and speeding up assembly.
It's often cited that around 70% of a product's manufacturing costs (materials, processing, assembly) are determined by decisions made during the design phase. This underscores the immense importance of adhering to best practices in design for manufacturing.
The Pitfall of Overly Tight Tolerances in DFM
A critical aspect that any experienced engineer will scrutinize during DFM is the tolerances specified on part drawings. Tolerance refers to the permissible range of variation for a specific dimension. Manufacturers frequently receive drawings with unnecessarily tight tolerances, which can significantly inflate costs and complicate production.
Why you should aim for the loosest acceptable tolerances:
Lower Tooling Costs: Tighter tolerances often require more precise and therefore more expensive tooling.
Ease of Manufacturing: Parts are easier to produce consistently when tolerances are reasonable for the chosen process.
Fewer Defects and Rejects: A wider acceptance window reduces the likelihood of parts falling out of spec.
Greater Yields: More of the produced parts will be usable.
All manufacturing processes have inherent limitations regarding achievable precision. Consult with your contract manufacturer or relevant trade organizations if you are unsure about reasonable tolerances for a given process and material. There is extensive data available for most common processes to guide these decisions.
Tolerances should primarily be driven by:
The capabilities of the chosen manufacturing process.
The properties of the material being used.
The functional sensitivity of the features to dimensional variations.
Managing tolerances effectively is a cornerstone of good design for manufacturing. There should always be a clear justification for every tolerance specified on a drawing.
How Long Does a Design for Manufacturing Review Take?
The time required for a DFM review can vary. It largely depends on the initial quality and completeness of the design you provide.
Think of it like proofreading an essay. If the writer's intent is clear and the text is well-structured, corrections can be made relatively quickly. However, if the essay is unclear or poorly organized, the editing process will likely involve more back-and-forth and take longer.
DFM is similar. If a design is already quite clean and addresses most manufacturability concerns, the review might be completed in a day or two. However, if there are numerous questions, complex issues to resolve, or if obtaining clear answers takes time, the process could extend to a week or more. The goal isn't speed for its own sake, but rather achieving a high-quality, manufacturable product. Your contract manufacturer should be able to provide an estimate based on their initial assessment.
A successful design for manufacturing process ideally concludes with a simplified, robust design that meets the customer's requirements for price, specifications, materials, and scheduling. In essence, the design is validated as "manufacturable" and is ready to proceed to the next stages of production


Comments